Showing posts with label upcycle. Show all posts

Wednesday, May 21, 2014

Quick & Easy Crocheted Rag Rug


I have tried making many rag rugs. I've braided, sewed, crocheted, and more. Most of them were way too time-consuming, turned out lumpy, frayed, or turned into a bowl (oops!). Where were the rag rugs for people who can't sew those braids flat no matter how hard they try??

It wasn't until I saw this simple photo that my rag rug world exploded. It was all, "Wait... you can crochet around fabric? HOW DID WE NOT KNOW THIS??"

That brings us to today. You CAN crochet around fabric, and it is incredibly fast and fun to do. As long as you know how to crochet flat, you can do it! And if you don't know how, it's as simple as increasing just enough so it doesn't ruffle or curl. There is lots of give and take, you can usually fix mistakes the next time around.


So far I've used about 15 old t-shirts, along with some pants and scrap fabric. This rug will likely grow at the pace we destroy our old clothes. It is a work in progress for sure.

My favourite thing about the rug is it makes a great baby play mat! I used this a lot when M was very little, so she could roll around on the ground without bonking her head on the hard floor, or slipping on a blanket. She likes it too, but won't stay in one place for long anymore.

I sincerely hope that if you've taken the time to read this, you'll also consider making your own. Happy rug making to you!

 "

Tuesday, March 25, 2014

Upcycled Yarn from Haiti


I found these little beauties upstairs at my parents-in-law's house, which they brought with them back to Canada after their nine-year stay in Haiti. The sticks are a bit broken now (I mean, it was over 27 years ago) but they sure are charming. Something about these feels almost magical. They almost make me enjoy that shade of pink.


As you can see up close, most of the yarn is a bit ruffled. The reason for this (I was told) is at the time, when Haitians got bins of donated sweaters from other countries, they would often upcycle them into new things. This sometimes took the form of yarn diamonds/kites, sometimes clothes, and sometimes full-out afghans.


Here is one of the afghans they brought home. It has so many beautiful reds, blues, greens, and yellows gathered from knit sweaters. Every month we've been taking Minka's photos on a different blanket background, so for seven months, decided to do it on this beautiful upcycled afghan. Here is the little squirt and a closer view of the blanket too. Don't be fooled, she's ten months now, but still loves cats, colours and grandmas.

Follow my blog with Bloglovin

Monday, June 18, 2012

Rug Hooking: Explored!

After a lesson for a Burlington artist, this month I finished by first rug hooking project with success! I had never done it before, but had admired my late grandmother's rug work and was itching to learn the ins-and-outs.
After seeing some of Jackie Lodder's beautiful rug hooking work at an Art Show during a James Street North Art Crawl, I knew I had to track her down and learn from her expertise. Conveniently, Jackie is the mother of two of my pals, so my friend Lindsay and I spent an evening to delving into this fine heritage craft. Jackie explained to us that this craft was originally done by women in New England and the Maritimes to transform old clothing into beautiful rugs. It was considered a country craft, and done by lower income families who could not afford factory made carpet in the 1830's. Below is a sample of Jackie's work - a circular pot holder and a rectangle rug.

Here is the crafty family trio themselves: Justine, Jackie and Kira. Below, you can see a complex winter scene that Jackie is currently working on. She primarily uses thrifted wool skirts for her material, or scraps from previous projects. After felting the fabric, she cuts it into tiny strips using a Wool Cutter.


Jackie had dozens of partially finished rug hooking projects given to her - so to learn, we began practicing on them. While rugging words and more complex images with hooking is completely possible, bold straight lines and shapes seemed to turn out best for folks new to the trade.

Lindsay and I had a blast learning from the Lodder ladies, myself working on a previously started owl piece and Lindsay on a new piece. Despite how it appears - we both did the same amount of hooking. It took a while for me to learn how to pull the wool through evenly, and to do straight diagonal lines but a great foundation had been laid.
After going home, I realized I should use up all my yarn before felting any wool, so used some scraps yarn to complete my first project. Yarn gives hooking a slightly more uneven look - but certainly does the trick. If you'd like to try it out - there are some great video tutorials out there that explain things nicely - including this one. Happy hooking!

Monday, May 21, 2012

Tutorial: How to Upcycle Plastic Bags

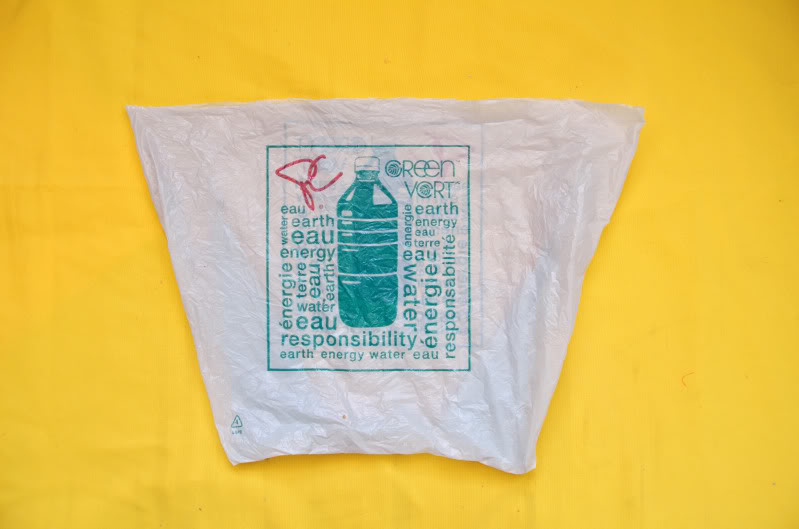
We seem to accumulate plastic bags one way or another, whether they once housed frozen veggies, milk, bread, or other purchased goods. If you find yourself with extra, here is a quick and easy way to turn them into something new. I first started using this method when crocheting with plastic bags. I lived in Manitoba at the time, in a small town where there were no stores. After I ran out of yarn, I needed something to keep me busy and it was a great free & upcycled substitute.

Step 1: Get some bags and a pair of scissors. Step 2: Trim off the handles. Step 3: Cut the base of the bag, down the seams, so the bottom is even and can lay flat. Step 4: Trim the bottom to cut off the jagged edge. Step 5: Cut the bag in a spiral shape, in one long strip that is your choice of width. Step 6: Keep going! Step 7: Fini! Now you can use this to crochet, knit, weave, wrap, embroider, make pom poms, sleeping mats, or a number of other things. To attach bags together, just poke a hole at the end of both strips and pull one through the other. Below are some samples of things I've done in the past. It can be used in place of a ribbon and bow as a great gift topper. It can be used to crochet or knit so many things. I even tried making slippers. They are quite durable, but just need to be lined inside with a soft material for comforts sake. It can even be used to make a hat!

Wednesday, March 28, 2012

Tutorial: How to Crochet with VHS Tape


Step 1: Gather Materials. VHS tapes are pretty easy to come by these days. After a search through my family's collection, I found at least ten with "taped off tv" specials they had no use for anymore. VHS tapes often end up in the garbage, but they come in very handy for crafty upcycling projects!

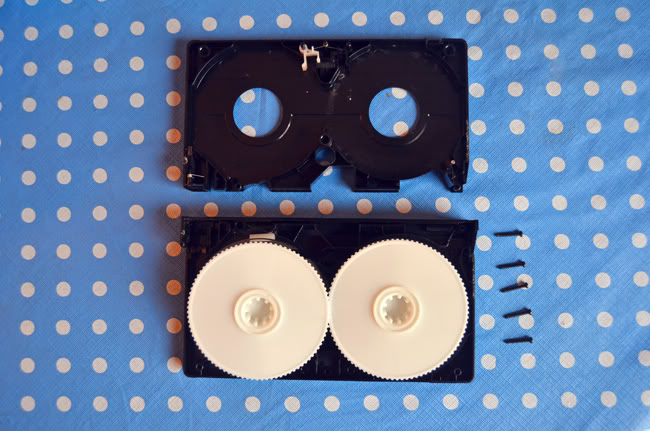
Step 2: Unscrew the screws. In most VHS tapes there are about five screws. You will need a REALLY small P0 size phillips screwdriver. If you don't have one, borrow one. If you can't borrow one, you can technically rip the cover open with your bare hands. The downside is the sharp shards of plastic; the upside is you'll feel very tough.
Step 3: Disassemble. Take out out the screws completely and separate the two sides of the tape from one another. It will take a bit of force, so pull hard.
Step 4: Wind to your preference. If the tape has been rewound, or watched to the very end, it will come out something like this. If you plan to crochet something that needs a thin and holey outcome (perhaps a grocery bag) then this is great. If you'd like it thicker, it's best to use two strands. For this you can either use a second VHS tape, or wind it to the centre so the film is equal on each side.

Step 5: Mix with Yarn (Optional). Personally, I find the product outcome is much more durable, versatile and waterproof when the VHS tape has been mixed with yarn. However, whether or not you add yarn can depend on what you are making.
Step 6: Crochet Something. There are many things you can make including purses, clutches, cell phone cases, belts, and the list goes on. I've been making a number of coin purses lately. They fit debit cards, cash or your sewing kit quite nicely. I love 'em!
 

Wednesday, March 21, 2012

Weddings & Craft Explosions

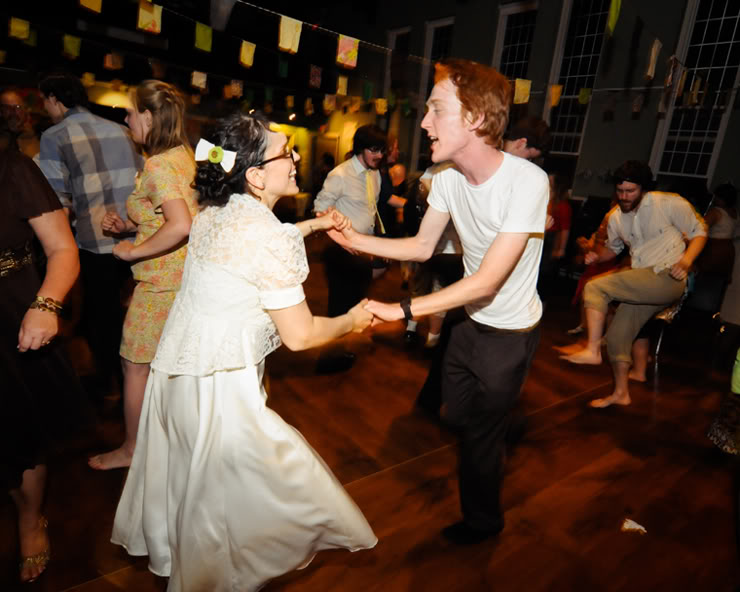
Preparing for my husband and I's wedding was perhaps the most craft intensive five months of my life. This of course, was because I set a goal that all decor (including invitations) needed to be done by hand, preferably out of reusable materials that I already had in possession (minus balloons). It was a great challenge, and with the help of many friendly hands, was made possible.

I wore my mother's wedding dress with a few alterations, including shortened sleeves and length. Extra lace from the sleeves of the dress combined with left over green material, were made into a bow-tie and complimenting hair-bow.

Our bouquets were all made from a hymnal and old National Geographic magazines using an origami flower tutorial something like this. I then put the flowers on skewer sticks, wrapped the stems in green fabric, and topped them with a button.

I was very pleased that we found almost everything the wedding party wore second-hand, despite the ambitious colour choices. The groomsmens' belts were made from bicycle tires and spokes by one of my husband's friends who works at Recycle Cycles. Neat, eh?


With scrap fabric, rope, and old t-shirts, I made prayer flags for the reception. After hours of making paper chains and paper flowers, these were a breeze! Tables were topped with paper bouquets and Sweet Ice Snow Cones were served before dinner.


The walls were decorated with newspaper chains as well as 3D Diamonds - which were made out of old magazines, by folding the top of each page diagonally and tucking in the bottom half.
My husband made an adorable piano of cardboard for envelope gifts.
The main favours included wedding mix cds and magnet medallions. The cd cases were made out of salvaged file folders, on which I printed a tandem linocut. The medallions were made from said file folders, hymnal pages and magazines. They were displayed in hand-weaved newspaper baskets.


Photos were taken by Evan MacAlpine.

You may also enjoy:

o