 Step 1: Gather Materials.
 VHS tapes are pretty easy to come by these days. After a search through my family's collection, I found at least ten with "taped off tv" specials they had no use for anymore. VHS tapes often end up in the garbage, but they come in very handy for crafty upcycling projects!
 Step 2: Unscrew the screws.
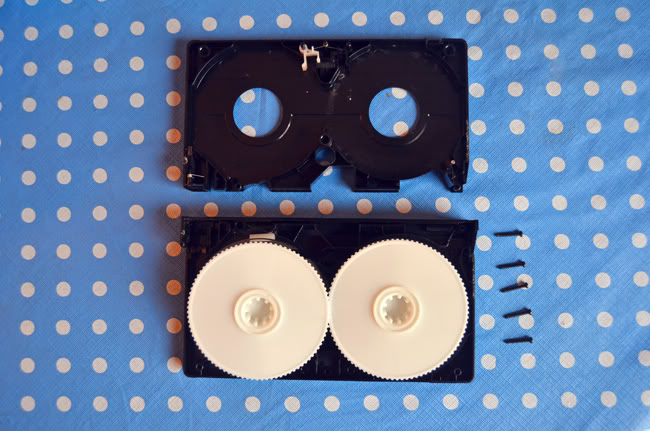
 In most VHS tapes there are about five screws. You will need a REALLY small P0 size phillips screwdriver. If you don't have one, borrow one. If you can't borrow one, you can technically rip the cover open with your bare hands. The downside is the sharp shards of plastic; the upside is you'll feel very tough.
 Step 3: Disassemble.
 Take out out the screws completely and separate the two sides of the tape from one another. It will take a bit of force, so pull hard.
 Step 4: Wind to your preference.
 If the tape has been rewound, or watched to the very end, it will come out something like this. If you plan to crochet something that needs a thin and holey outcome (perhaps a grocery bag) then this is great. If you'd like it thicker, it's best to use two strands. For this you can either use a second VHS tape, or wind it to the centre so the film is equal on each side.

 Step 5: Mix with Yarn (Optional).
 Personally, I find the product outcome is much more durable, versatile and waterproof when the VHS tape has been mixed with yarn. However, whether or not you add yarn can depend on what you are making.
 Step 6: Crochet Something.
 There are many things you can make including purses, clutches, cell phone cases, belts, and the list goes on. I've been making a number of coin purses lately. They fit debit cards, cash or your sewing kit quite nicely. I love 'em!


 Referencing the ever popular Torn Fabric Garland Tutorial, my dear friend Naomi and I spent the weekend dyeing, ripping, and tying fabric to prepare for her wedding this June. We ended up making about thirty feet of garland, and used about five or so cotton sheets to do so.
 Naomi met her partner while volunteering in a garbage community in Egypt. They'll be getting married in a forest in Pennsylvania, and then moving to Philly for a while, before heading out to live and work in a slum community in an undetermined country. In summary, Naomi is great and so is her fiance, Ben! Along with many other handy hobbies, he makes wood cut prints, which you can see here.
 This project is very self-explanatory and straight forward: Dye, Rinse, Dry, Rip, Tye. My only three tips are (a) remember to get some rubber gloves before you start dyeing unless you want stained hands; (b) consider using more dye than you think you may need if you want the colours to be vibrant and (c) make sure you have a large clothes line or multiple drying racks lined up.


 Tada!! Also on this topic, for Easter our church decorated a set of escarpment stairs with torn fabric which you can see below. Busy bees Meg and Meagan worked hard to set the whole thing up, and one by one people tied on the fabric while going up the stairs.
